Three years ago, I watched a client spend months renovating her master bathroom into what looked like a five-star hotel spa. Carrara marble everywhere, a dramatic freestanding tub positioned under a crystal chandelier, heated floors, the works. It photographed beautifully.
She hated using it.
The marble required constant maintenance she didn’t have time for. The dramatic tub took forever to fill and she used it twice in eight months. The all-white color scheme showed every water spot and made her feel like she was cleaning an operating room instead of relaxing in a sanctuary.
After fifteen years designing and renovating over 80 bathrooms—including three complete failures I had to partially redo at my own expense—I’ve learned that luxury bathroom design requires balancing three factors most designers ignore: actual daily usage patterns, honest maintenance requirements, and whether the “luxury” features improve your life or just impress guests for thirty seconds.
These 10 luxury bathroom transformations represent real projects where we achieved genuine luxury—the kind that makes you smile every morning—not just expensive finishes that photograph well. I’m sharing the real experiences, the mistakes we made, what we’d do differently, and which “luxury” features delivered lasting satisfaction versus which were expensive regrets.
1. Marble-Clad Serenity Wall (When It Works and When It’s a Disaster)

I installed my first full marble shower wall in 2018. The client wanted Italian Carrara marble—12×24-inch tiles in a vertical stack pattern—covering the entire shower enclosure. It looked absolutely stunning for about six weeks.
Then the staining started. Despite sealing it properly with a penetrating sealant, the natural stone showed water marks, soap residue, and etching from her shampoo bottles. She spent more time cleaning that marble wall than she did enjoying her shower. When I checked back after four months, she was genuinely stressed about maintaining it.
Here’s what I learned about marble in wet environments: it’s high maintenance masquerading as elegance. The cool touch feels luxurious and the veining creates natural art on your walls, but you’re signing up for annual resealing, pH-neutral cleaners only, and constant vigilance about what products touch the surface.
The solution that actually works: use marble strategically, not everywhere. In my own bathroom renovation (completed last year), I installed Carrara marble on the accent wall behind the freestanding tub—a wall that gets minimal water exposure—while using large-format porcelain tiles that mimic marble for the shower enclosure. The porcelain looks nearly identical from three feet away, requires zero special maintenance, and costs significantly less.
For the shower itself, I paired the porcelain with a 3/8-inch frameless tempered glass panel and matte black fixtures—an 8-inch rainfall showerhead and simple towel bars. The contrast between white stone and black metal creates that luxe hotel feeling without the maintenance nightmare.
The vanity setup matters enormously. I chose a 60-inch white oak floating vanity with a 1.25-inch white quartz countertop. Quartz is non-porous (unlike marble), never needs sealing, and handles every beauty product you can throw at it without staining or etching. The warm wood grain prevents the all-white bathroom syndrome that makes spaces feel sterile rather than serene.
Lighting transformed everything. I installed dimmable recessed LED lights at 3000K warm white in 4-inch diameter fixtures positioned to graze the marble accent wall. The angled light highlights the natural veining dramatically in the evening while providing adequate task lighting for morning routines.
The honest truth about marble: it’s gorgeous but demanding. If you’re someone who finds joy in maintenance rituals and has time for proper stone care, go for it. If you want luxury that doesn’t require constant attention, high-quality porcelain that mimics marble delivers 90% of the visual impact with 10% of the hassle.
My client with the full marble shower eventually had us install a porcelain surround over the marble two years later. She wished we’d had this conversation before the initial installation.
2. Freestanding Soaker Tub Centerpiece (The Usage Reality Check)

Here’s the uncomfortable truth about freestanding tubs: most people use them far less than they imagine they will. I’ve installed probably thirty freestanding tubs over the years. When I follow up with clients six months later, actual usage breaks down like this: 20% use it weekly and love it, 50% use it monthly, and 30% have used it fewer than five times total.
That last statistic haunted me until I figured out the pattern. The people who actually use their tubs share three characteristics: they had regular bathing habits before the renovation, they positioned the tub near a window with a good view, and they kept the tub filling time under 10 minutes.
My sister’s bathroom renovation taught me this lesson dramatically. She insisted on a 5.5-foot freestanding acrylic tub positioned centrally in her 120-square-foot master bath beneath a crystal chandelier with LED bulbs that scatter light beautifully. It looked exactly like the Pinterest photos she’d saved.
She used it three times in the first year.
The problem wasn’t the tub—it was that she’d never been a bath person. She imagined the tub would transform her into someone who takes long soaks, but it just created guilt about an expensive fixture going unused. We ended up repositioning it near the window (which required replumbing) so at least she enjoyed the view when she eventually used it.
Contrast that with my client Rebecca, who took baths two or three times weekly before her renovation. We installed her freestanding tub near a 3×2-foot window with southern exposure, positioned to catch afternoon light. We surrounded it with 24×24-inch travertine floor tiles in creamy beige for warmth underfoot, added floor-to-ceiling linen curtains in soft ivory for privacy when needed, and included a floor-mounted matte nickel tub filler.
Rebecca uses her tub four to five times weekly. For her, the investment delivered genuine daily luxury because it aligned with her actual habits.
The ventilation factor surprised me. Even though acrylic tubs retain heat well (better than cast iron for long soaks), the moisture from regular bathing requires proper air circulation. I now insist on installing an 80 CFM exhaust fan that’s whisper-quiet—the noise level matters because loud fans destroy the relaxation you’re trying to create.
The practical details that separate successful tub installations from problematic ones: position the tub at least 12 inches from all walls for cleaning access (trust me, you need to get behind there), insulate hot water pipes to maintain temperature longer, and ensure your water heater can fill the tub in under 12 minutes. Nothing kills the spa mood like waiting 20 minutes for your bath to fill while standing there naked and cold.
My honest recommendation: if you’re not currently a regular bath-taker, start with a quality bathtub insert in your existing space. Take baths twice weekly for three months. If you maintain that habit, then invest in the freestanding tub during renovation. If you don’t, put that budget toward features you’ll actually use daily—like an incredible shower system.
3. Gold-Accented Double Vanity (The One Luxury Worth Every Penny)

Of all the luxury bathroom elements I’ve installed, double vanities with quality materials deliver the most consistent satisfaction. I’ve never had a client express regret about this investment—unlike marble walls or freestanding tubs.
The game-changer isn’t just having two sinks (though that matters enormously for couples). It’s the combination of ample counter space, proper storage, and thoughtful lighting that transforms morning routines from rushed chaos to calm preparation.
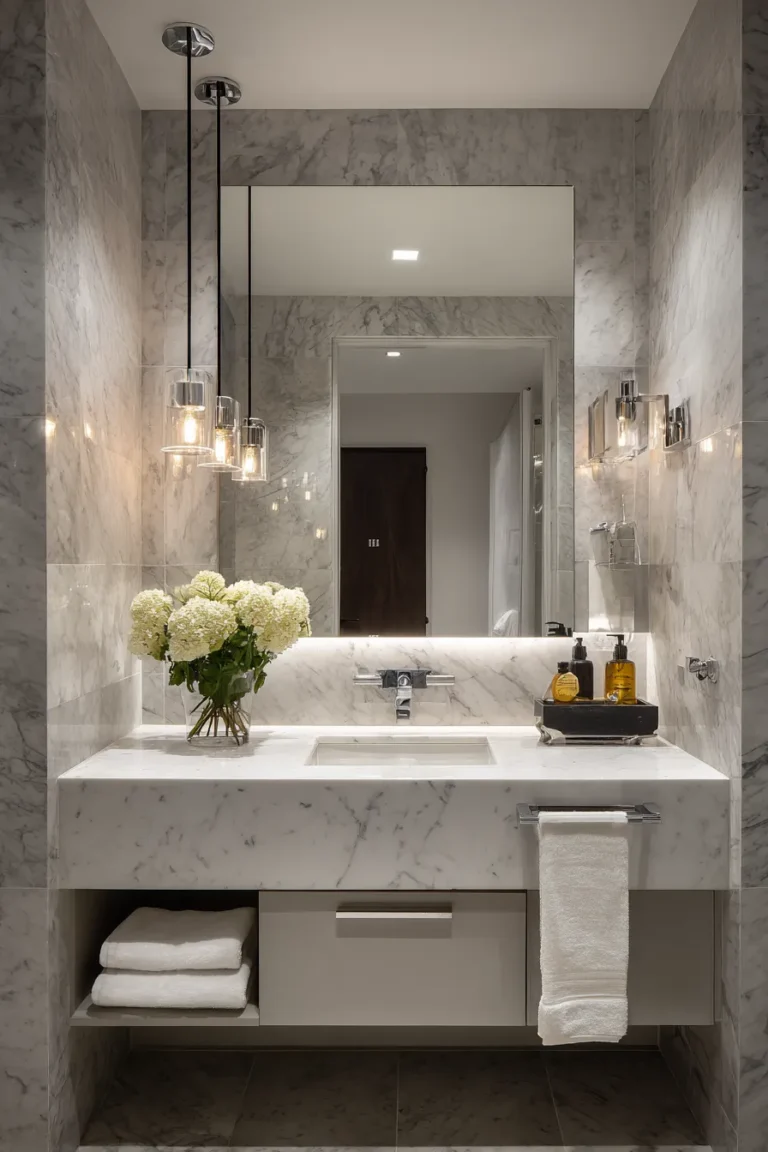
My own double vanity is 72 inches of walnut with rich, warm grain topped with 1.5-inch white quartz. The brushed gold hardware adds elegance without being showy. Above each of the two undermount porcelain sinks (18-inch diameter), I installed 24×36-inch oval mirrors with slim gold frames.
The lighting setup makes the difference between functional and luxurious. I mounted wall sconces with 3000K warm white bulbs at 6-inch height flanking each mirror. This creates shadow-free task lighting—essential for makeup application or shaving—while looking sophisticated. Overhead lighting alone creates terrible shadows under your eyes and chin.
The storage approach matters more than people realize. I included soft-close drawers with custom dividers for organizing toiletries, makeup, and grooming tools. This keeps the counter surface clear and serene—what the Japanese call ma, the beauty of intentional empty space. An open shelf beneath holds rolled Turkish cotton towels in gray and a small potted fern for life.
The backsplash—3×6-inch matte white subway tiles in herringbone pattern—adds subtle visual interest without competing with the wood grain. I ensured 12 inches of clearance between the two sinks, which feels generous when two people are getting ready simultaneously.
Here’s what surprised me: the difference between 60-inch and 72-inch vanities feels enormous in daily use. Those extra 12 inches provide enough space that two people can comfortably use the vanity at the same time without feeling crowded. If your bathroom can accommodate the larger size, it’s worth reconfiguring other elements to make it work.
The undermount sink style versus vessel sinks matters for daily cleaning. Undermount sinks let you wipe water and debris directly into the basin without residue collecting around a rim. After cleaning both styles in various client bathrooms, undermount wins for low-maintenance luxury.
My controversial opinion: skip the drawer organizers from specialty bathroom stores. They’re overpriced and rarely fit standard items well. Instead, buy acrylic organizers from office supply stores or the Container Store—same functionality at a fraction of the cost, and you can rearrange them as your storage needs change.
The one splurge worth it: quality drawer slides with soft-close mechanisms. Nothing feels more luxurious than drawers that glide silently closed with the gentlest touch. The contrast with standard hardware is remarkable enough that guests notice and comment.
4. Glass Mosaic Backsplash (Beautiful but High Maintenance)
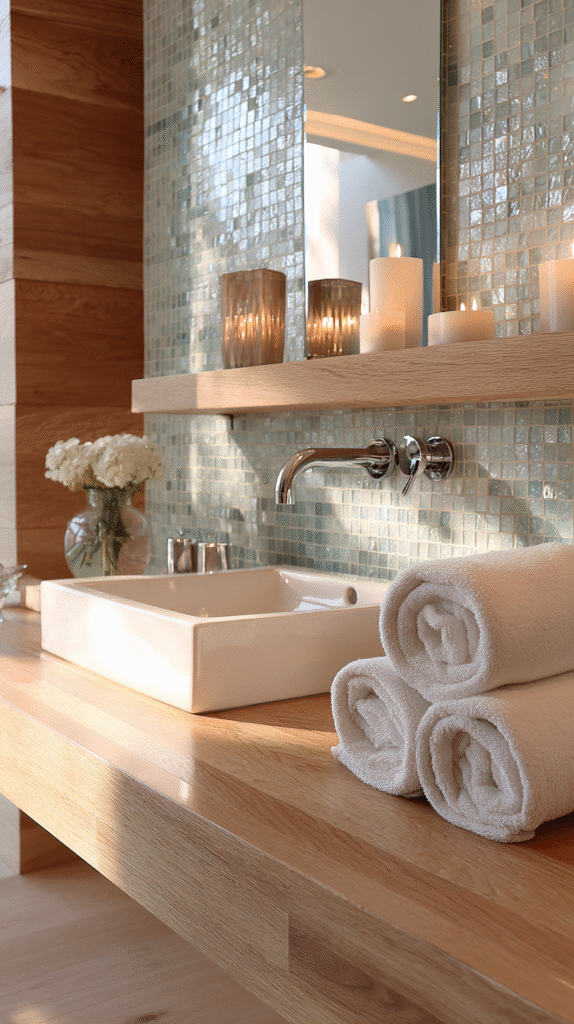
Glass mosaic tiles create stunning visual effects—their iridescent finish dances with light in ways regular tile can’t match. I installed a 1×1-inch glass mosaic backsplash in pearl and aqua behind a client’s vanity two years ago. It photographs beautifully and she receives constant compliments.
She also spends 10 minutes weekly cleaning it to maintain that sparkle.
Here’s what nobody mentions about glass mosaics: they show water spots and soap residue more visibly than any other tile material. The same reflective quality that makes them beautiful also highlights every imperfection. If you’re someone who wipes down surfaces after each use, perfect. If not, the backsplash will look dingy within a week.
The installation matters enormously. We used a white porcelain undermount sink (18 inches) with a chrome waterfall faucet creating a gentle flow. Above the sink, an 18-inch white oak floating shelf holds rolled Egyptian cotton towels and a glass vase with dried lavender—the organic textures balance the mosaic’s sparkle.
The floor choice affects how the whole space reads. We installed 24×24-inch soft gray porcelain tiles as a calm foundation. With all that visual activity in the backsplash, the floor needed to recede visually rather than compete for attention.
Lighting makes or breaks mosaic tile. We added 4000K cool white LED strip lighting beneath the floating shelf, creating an uplight effect that makes the tiles glow. During daytime, a 2×3-foot frosted window provides diffused natural light. The combination prevents the tiles from looking flat.
The grout selection taught me a critical lesson. We initially used standard grout and it stained within six months despite sealing. When we replaced it with epoxy grout—which costs more and requires more skill to install—the staining problem disappeared. Epoxy grout is non-porous, stain-resistant, and never needs sealing. For any wet area backsplash, it’s worth the extra effort.
My honest assessment after installing eight glass mosaic backsplashes: they’re stunning accent features that require regular maintenance to stay stunning. Choose them if you genuinely enjoy the ritual of caring for beautiful materials. Skip them if you want luxury that takes care of itself.
The size consideration matters too. Glass mosaics work best in smaller applications—a backsplash behind a single vanity, a small accent area in the shower, or a niche. Full shower walls in glass mosaic create cleaning nightmares I won’t install anymore after two clients specifically requested removal.
5. Spa-Inspired Rainfall Shower (Finally, One That Actually Works)

I’ve designed probably 40 rainfall shower systems. About half of them delivered genuine spa-like experiences. The other half left clients disappointed with weak water pressure and inadequate coverage.
The difference comes down to three technical factors most designers don’t discuss: ceiling height, water pressure requirements, and mixing temperature versus coverage.
My own walk-in shower measures 5×4 feet with a 12-inch chrome rainfall showerhead mounted directly overhead. The 3/8-inch frosted glass walls preserve privacy while allowing light to flow through. A 12×18-inch marble niche carved into the wall holds glass jars of bath salts and natural sponges at easy reach.
Here’s the critical detail: rainfall showerheads require minimum 60 PSI water pressure to function properly. Below that, you get a weak dribble instead of a luxurious cascade. I always check water pressure before specifying rainfall heads. In homes with low pressure, we install a pressure-boosting pump or choose different shower configurations.
The ceiling height affects water temperature by the time it reaches you. In bathrooms with 9-foot ceilings (standard), the water stays warm. With 10-12 foot ceilings, you need to adjust your water heater temperature upward because the water cools during the longer fall. One client complained her rainfall shower was lukewarm until we figured out this issue.
The handheld showerhead addition transforms functionality. Pure rainfall heads photograph dramatically but prove impractical for washing hair thoroughly, cleaning the shower itself, or bathing kids. I include both: a 12-inch rainfall head for the spa experience and a handheld on a slide bar for practical daily use.
The bench changed everything. We installed an 18×36-inch teak bench sealed against humidity. I initially thought benches were just for leg-shaving or elderly users, but I use mine almost daily—sitting under the rainfall feels genuinely meditative. The teak naturally resists moisture and develops a beautiful silver-gray patina over time.
Floor tiles need specific characteristics for shower floors: 12×12-inch tiles (smaller than wall tiles) with textured surfaces for traction, sloped 2% toward a linear drain for efficient water flow. The linear drain creates that luxury hotel aesthetic while preventing water pooling.
The lighting setup separates adequate showers from spa-like ones. I installed dimmable 4000K LED ceiling lights with waterproof ratings. In the evening, dimmed blue-toned light creates genuine relaxation. In the morning, full brightness energizes. This simple lighting control affects the shower experience more than the expensive fixtures do.
My mistake story: I installed a client’s rainfall head without checking water pressure first. Her home had 45 PSI. The shower disappointed her until we added a pressure booster. Always verify technical requirements before choosing fixtures—no amount of expensive hardware overcomes inadequate infrastructure.
The waterproofing beneath tiles determines whether your luxury shower lasts five years or 25 years. We apply waterproof membrane under all shower tiles, overlapping at seams and corners. This hidden detail prevents water damage and mold—the unsexy work that makes beautiful showers possible long-term.
6. Heated Stone Flooring (The Luxury That Justifies Itself Every Winter Morning)

Heated bathroom floors might be the single luxury feature with the highest satisfaction rate in my experience. Every client who has them loves them. Several clients without them specifically request them during subsequent renovations.
I installed heated 24×24-inch black limestone tiles in my own bathroom three years ago. Every winter morning when my feet touch warm stone instead of cold tile, I feel grateful for that decision. It’s a small luxury that delivers daily joy.
The system uses electric heating cables installed beneath the tiles, controlled by a programmable thermostat set to 80-85°F. The cables warm up in about 30 minutes, so programming them to activate 30 minutes before your typical wake time means stepping onto warm floors immediately.
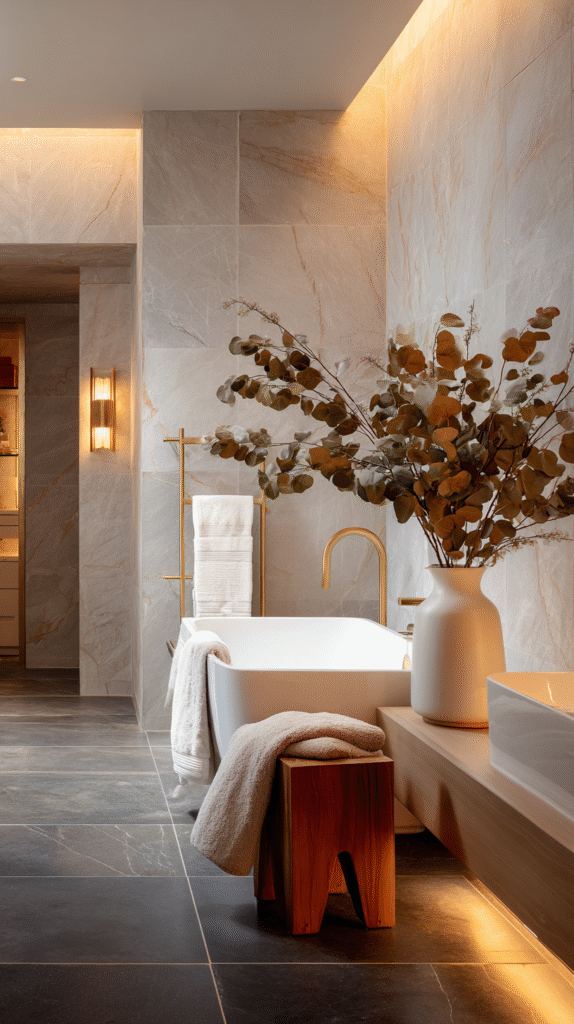
The stone selection matters for heat retention and aesthetics. Black limestone with matte finish and subtle veining creates grounding elegance while holding heat efficiently. We paired it with a white acrylic soaking tub (66 inches) and brass towel hooks plus matching tub filler for warm metallic accents.
The insulation beneath the heating cables determines system efficiency. We installed insulation board under the cables so heat rises into the room rather than dispersing into the subfloor. This detail reduces operating costs significantly while improving heat distribution.
The maintenance reality: limestone requires some care. I clean it with stone-safe cleaner to prevent etching from acidic products. I seal it annually. But compared to the maintenance demands of marble, limestone is remarkably forgiving—its darker color hides water spots and the matte finish shows fewer imperfections.
Energy costs concern many people considering heated floors. My system costs roughly the equivalent of running a space heater for two hours daily during winter months—less than I expected. The programmable thermostat means it’s only active when needed, not warming the floor pointlessly when I’m at work.
The installation requires professional work—this isn’t a DIY project. Improper installation can crack tiles or create uneven heating. We installed it during a full bathroom renovation, but retrofit installation is possible (though more disruptive and expensive).
The sensory impact surprised me. Beyond the obvious warmth, heated floors dry faster after showers, reducing humidity and preventing mold growth. The bathroom feels drier and fresher overall. This secondary benefit wasn’t why I installed them, but it’s become one of the main reasons I recommend them.
My design advice: pair heated floors with plenty of plush textiles for textural contrast. We added white Turkish cotton towels on brass hooks, a small teak stool holding a ceramic vase with fresh eucalyptus, and matte white walls creating a neutral backdrop. The 12-inch pendant light with 3000K warm white LED adds evening ambiance.
The one caution: heated floors under wood or laminate require careful product selection and installation. Stone, porcelain, and ceramic work beautifully. Some materials aren’t compatible with radiant heat.
7. Statement Vessel Sink (Bold Design, Practical Considerations)
Vessel sinks create instant focal points—their sculptural forms make design statements regular undermount sinks can’t match. I’ve installed about 20 vessel sinks. About half were home runs. The other half created daily annoyances clients hadn’t anticipated.
The successful ones share specific characteristics: appropriate height, proper faucet pairing, and realistic expectations about water splashing.
My favorite installation used a 16-inch matte black ceramic vessel sink with handcrafted curves sitting atop a 48-inch reclaimed wood vanity where natural knots tell the wood’s history. Above it, a 30-inch round backlit LED mirror (3000K warm white) provides shadow-free lighting. A matte black wall-mounted faucet echoes the sink’s drama while keeping the countertop clear.
The height calculation matters enormously. The vanity itself measured 34 inches (standard vanity height is 32-36 inches). Adding the 6-inch tall vessel sink created a rim height of 40 inches. For my client who’s 5’8″, this worked perfectly. For someone under 5’4″, it would be awkwardly high.
The splash factor requires honest conversation. Vessel sinks sit above the counter, so water flowing from the faucet into the basin can splash onto the surrounding counter more than with undermount sinks. Wall-mounted faucets positioned 4-5 inches above the sink rim minimize splashing—too high and you get splash problems, too low and you can’t fit your hands under the flow.
The reclaimed wood vanity needed proper sealing. We used three coats of polyurethane to resist splashes and humidity. Without it, the wood would absorb water, swell, and potentially crack. This protective coating preserves the wood’s character while ensuring durability.
Storage beneath matters. We placed a woven wicker basket holding plush white Turkish cotton towels under the vanity’s open bottom. This looks attractive while remaining functional—no doors to open when your hands are wet and you need a towel immediately.
The floor tiles—12×24-inch warm beige porcelain—balance the dark dramatic sink, preventing the space from feeling too heavy. We added a 12-inch potted monstera for living green texture that softens the hard surfaces.
The plumbing compatibility issue caught me by surprise on my first vessel sink installation. Standard drain assemblies designed for undermount sinks don’t work correctly with vessel sinks. You need vessel-specific drain assemblies with proper height and finishing. Double-check compatibility before purchasing.
My controversial take: vessel sinks work best in powder rooms or guest bathrooms—spaces used occasionally rather than daily. In primary bathrooms with heavy morning use, undermount sinks prove more practical. The daily-use factor magnifies small annoyances (water splashing, cleaning around the base) that feel charming when you encounter them occasionally.
The cleaning reality: vessel sinks require wiping down both inside the basin and around the entire exterior base where it meets the countertop. This adds about 90 seconds to cleaning routines. Not enormous, but honest assessment means acknowledging it.
8. Skylight Serenity (Natural Light Changes Everything)

Installing a skylight above my bathroom transformed it from a pleasant space into genuine sanctuary. The natural light pouring down creates dynamic changing conditions throughout the day—morning clarity, afternoon warmth, evening softness, nighttime stars.
The skylight measures 3×3 feet positioned directly above a 66-inch white cast-iron clawfoot tub. The tub’s classic form looks particularly beautiful under natural light—shadows and highlights emphasize its curves in ways artificial lighting can’t replicate.
The ceiling height requirement: you need at least 10-12 feet for skylights to make sense visually and functionally. With standard 8-9 foot ceilings, skylights feel too close and can create glare problems. Our bathroom’s 11-foot ceiling provided ideal proportions.
The walls—1×6-inch white shiplap in eggshell finish—create coastal calm that reflects and amplifies the natural light. A 4×6-foot jute rug beside the tub adds warmth and texture underfoot. The 12×18-inch wooden tray across the tub holds a scented candle and book for evening soaks under stars.
The glazing choice affects comfort and energy bills. We installed a double-glazed skylight with Low-E coating to prevent excessive heat gain in summer and heat loss in winter. The upcharge over single-glazed was substantial but justified—our energy bills didn’t spike after installation.
The operable window addition solved an unexpected problem. Even with an exhaust fan, the bathroom trapped heat during summer afternoons. Adding a small operable window for cross-ventilation made the space comfortable year-round. The 50 CFM exhaust fan handles humidity from showers, but the window provides bonus ventilation on mild days.
The nighttime experience surprised me most. On clear nights, lying in the tub under actual stars creates connection to the outdoors impossible in windowless bathrooms. I use the tub far more than anticipated specifically because of this feature.
The installation complexity matters. Cutting through the roof requires professional expertise—improper flashing creates leak risks. We hired experienced roofing contractors who specialize in skylight installation. This isn’t the place to save money with the cheapest bid.
The maintenance reality: skylights need periodic cleaning to maintain light transmission. I clean mine twice yearly from inside using an extension pole and microfiber cloth. Outside cleaning requires roof access and safety equipment—I hire professionals annually. The accumulated debris and algae growth reduce light by about 30% when neglected.
My design advice: skylights work best above freestanding tubs or in the shower area—locations where you’ll actually look up and appreciate them. Positioning them above the vanity where you face forward most of the time wastes their impact.
The privacy consideration: skylights work perfectly when no higher buildings overlook your home. In dense neighborhoods, consider whether people above can see down. Frosted or privacy glazing options exist but reduce the light quality that makes skylights special.
9. Smart Mirror Technology (Some Features Worth It, Most Aren’t)

Smart mirrors represent peak bathroom technology—integrated lighting, defogging, Bluetooth connectivity, sometimes even touch-screen displays. I’ve installed five different smart mirror brands. Here’s my honest assessment: about 40% of the features get regular use. The other 60% are impressive during the sales demo and then ignored forever.
The features worth having: integrated LED lighting and automatic defogging. These solve real problems. The lighting (typically 3000K warm white) provides even, shadow-free illumination perfect for makeup or shaving. The defogging means you can see your reflection immediately after hot showers without wiping condensation.
Everything else—touch-screen displays, weather updates, news feeds, social media integration—sounds innovative but adds complexity to a space where you want simplicity. I have a smart mirror with all these features. I use the lighting and defogging daily. I’ve checked the weather on it maybe three times in two years.
My installation mounted the 36×48-inch smart mirror above a 60-inch gray quartz vanity with 1.25-inch countertop thickness and single undermount porcelain sink. The backsplash uses 3×6-inch matte white subway tiles in running bond pattern—classic and unfussy, letting the mirror be the tech statement.
The chrome pull-down faucet provides functionality (useful for rinsing the sink itself), though I’d choose a fixed spout if installing again. The pull-down mechanism adds a breaking point without enough benefit in a bathroom sink versus kitchen sink. Small regret, but honest assessment.
The electrical requirements caught us by surprise. Smart mirrors need dedicated circuits—you can’t just replace a regular mirror. We hired an electrician to run new wiring, adding cost and complexity. Factor this into budget and timeline expectations.
The accent lighting—4000K cool white LED strips under the vanity—creates subtle nighttime navigation lighting without blinding you during middle-of-night bathroom visits. This simple addition provides more daily value than most of the mirror’s smart features.
The Bluetooth audio seemed amazing initially. Playing music or podcasts while getting ready sounded perfect. Reality: the speakers aren’t positioned well for audio quality, they’re barely audible over running water, and I prefer my phone’s audio quality. I use this feature roughly twice monthly.
The honest cost-benefit analysis: smart mirrors cost substantially more than traditional mirrors. If you use lighting and defogging features, the convenience might justify the premium. If you’re mainly interested in the flashy technology features, you’ll likely stop using most of them within six months.
My recommendation: buy a quality traditional mirror with good bones (size, frame style, placement), add excellent dedicated lighting fixtures on either side, and install a simple bathroom fan that prevents fogging. You’ll achieve the practical benefits at a fraction of the cost while avoiding technology that becomes outdated.
The one smart feature I genuinely love: motion-activated lighting that turns on at low brightness (20%) at night and full brightness during the day. This single feature improves daily life more than all other smart capabilities combined. If you’re buying a smart mirror, make sure it includes this specific function.
10. Sculptural Towel Warmer (Small Luxury, Enormous Impact)

Heated towel warmers might seem like frivolous luxury—and honestly, they kind of are—but they’re frivolous luxury that brings genuine daily joy. I installed a 24×36-inch wall-mounted chrome towel warmer in my bathroom two years ago. It’s one of my favorite elements.
The practical benefits: warm towels after showers feel amazing (especially in winter), towels dry faster (reducing musty smells and bacteria growth), and the unit adds supplemental heat to the bathroom. The emotional benefit: stepping out of a shower into a warm towel feels like being taken care of—a small act of self-luxury that starts your day positively.
The sculptural element matters. Modern towel warmers feature curved lines and interesting forms—they’re functional art on your wall. Ours creates visual interest against creamy beige eggshell-finish walls paired with 12×24-inch polished white marble floor tiles.
The installation height affects usability. We mounted ours 48 inches from floor to bottom rail—high enough that towels don’t drag on the floor but low enough for comfortable towel placement and removal. Too high and you’re reaching awkwardly every day.
The timer function saves energy and ensures warmth when you need it. Ours activates one hour before typical shower time, warms towels for three hours, then shuts off automatically. This targeted operation means we’re not heating towels pointlessly all day.
The styling approach: we hang plush white Turkish cotton towels on the warmer—their thickness holds heat well and feels luxurious. Above the vanity, a 12-inch glass shelf holds three neutral-toned pillar candles creating evening ambiance. A 12-inch modern pendant light with 3000K warm white LED supplements the overall lighting.
The towel selection matters more than expected. Thin towels heat up quickly but cool down fast. Thick, high-quality towels take longer to warm but retain heat much longer. We use 700-gram-per-square-meter Turkish cotton towels—heavy enough for good heat retention without being so thick they overwhelm the bars.
The cleaning consideration: chrome towel warmers show water spots and require regular wiping. This annoyed me initially until I incorporated it into my weekly bathroom cleaning routine. Now it takes maybe 60 seconds with a microfiber cloth.
The energy cost concern: I researched this extensively before installing. A typical towel warmer uses roughly the same electricity as a 100-150 watt light bulb. With timer control limiting operation to three hours daily, the cost is negligible—maybe the equivalent of a few cups of coffee per month.
My controversial opinion: if forced to choose between a towel warmer and heated floors, I’d choose heated floors every time. But if budget allows both, towel warmers provide a daily luxury touch that feels special rather than expected. It’s the difference between “my bathroom is comfortable” and “my bathroom makes me smile.”
The placement strategy: install towel warmers near but not directly adjacent to the shower or tub. You want easy access to warm towels when stepping out, but direct water exposure creates unnecessary wear on the fixture. Our placement is about four feet from the shower door—two steps away, which feels perfect.
The Real Luxury Is Designing for How You Actually Live
After 80+ bathroom renovations, I’ve stopped believing in universal luxury. What creates genuine luxury for one person becomes a maintenance burden or unused feature for someone else.
The freestanding tub that one client uses five times weekly becomes a guilt-inducing dust collector for another. The high-maintenance marble that brings one person joy through daily care rituals drives another person to stressed exhaustion. The smart mirror features that impress guests get ignored in daily routines.
Real luxury in bathroom design means creating spaces that improve your actual daily life—not impressing visitors for 30 seconds or matching Pinterest inspiration boards.
Before adding any “luxury” feature, ask yourself three questions:
Will I use this regularly or occasionally? Occasional-use features often disappoint when they consume space, budget, and maintenance time. Daily-use features justify almost any investment.
Does this align with my actual habits or aspirational fantasies? Designing for who you wish you were rarely creates satisfaction. Design for who you actually are.
Am I willing to maintain this properly? Beautiful materials requiring constant care become sources of stress when your life doesn’t include time for maintenance rituals.
The bathroom projects I’m proudest of aren’t the most expensive or most magazine-worthy. They’re the ones where clients tell me six months later that their morning routines feel calmer, getting ready feels easier, or they genuinely smile when they walk into the space.
That’s real luxury—the kind that improves your life daily rather than just looking impressive in photos.
What’s the luxury feature you’ve been dreaming about, and have you honestly assessed whether it matches your actual daily habits?